Christmas Craft Ideas; 25 tips for Kids and Families
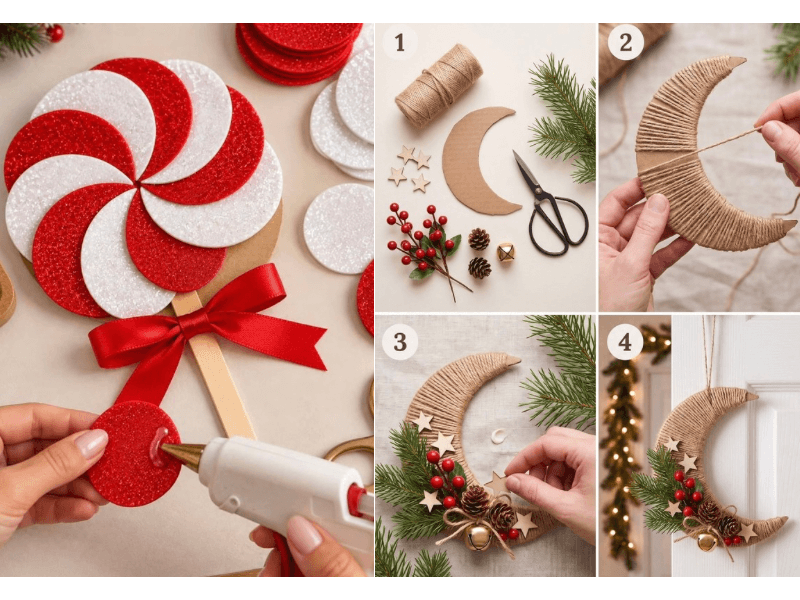
Christmas is one of the most wonderful times of the year, and one of my favorite ways to make the season special is by creating beautiful things with the family. From handmade Christmas ornaments to adorable paper snowflakes and festive mason jar decorations, Christmas crafts are a fun way to bring creativity, joy, and a little holiday magic into your home.
And the best part? You don’t need to spend a fortune on craft supplies or be an expert DIY enthusiast to make something beautiful!
If you’re a mom looking for fun Christmas activities to keep the kids entertained during the holidays or you simply want to add a personal touch to your Christmas decorations, these 25 easy Christmas craft ideas are perfect for you.
Most of these projects use simple, affordable materials you may already have at home, making them ideal for a cozy afternoon of Christmas crafting.
Let’s get creative!
Christmas crafts
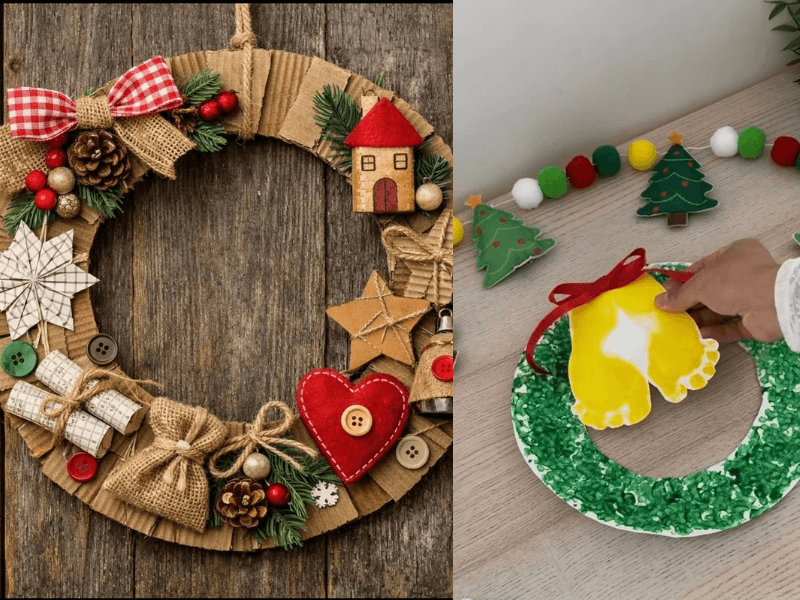
1. Paper Plate Christmas Wreath
Paper plates make a wonderful base for an easy Christmas wreath, especially for younger children.
What you’ll need:
- Paper plates
- Green paint or green construction paper
- Red paper or ribbon
- Glue
- Scissors
- Small pom-poms or stickers
How to make it:
Cut out the center of a paper plate to create a ring. Paint the ring green or cover it with pieces of green paper. Decorate it with red paper berries, pom-poms, bows, and stickers.
Add a ribbon at the top so you can hang your wreath on a door or wall.
Mom tip: Let each child decorate their wreath differently. These handmade decorations look adorable displayed together!
2. Popsicle Stick Christmas Trees
Turn simple craft sticks into charming miniature Christmas trees.
What you’ll need:
- Popsicle sticks
- Green paint
- Glue
- Buttons, sequins, or small stickers
- String or ribbon
How to make it:
Arrange three popsicle sticks into a triangle and glue the ends together. Paint the triangle green and allow it to dry. Add a small brown stick at the bottom for the tree trunk.
Decorate with colorful buttons, sequins, or stickers, then attach a ribbon loop if you want to hang it on your Christmas tree.
These little trees can also be used as handmade Christmas gifts for grandparents, teachers, and friends.
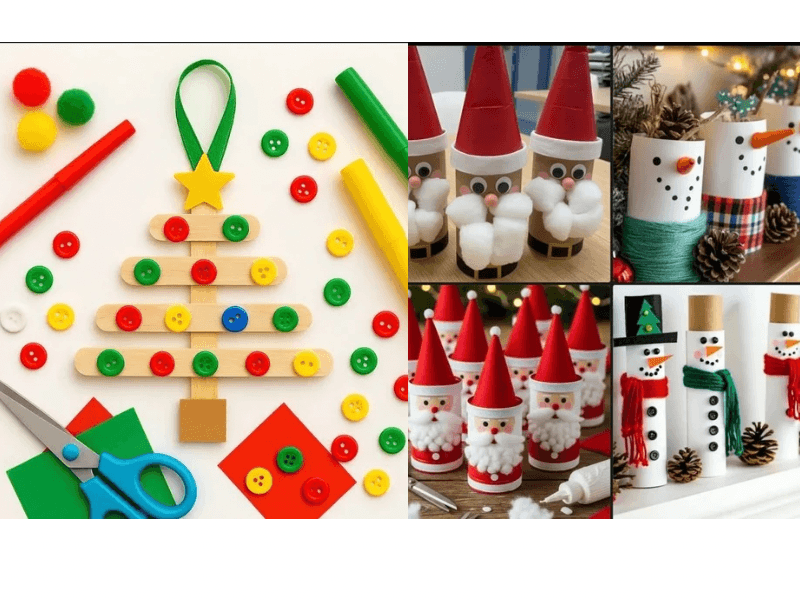
3. Toilet Paper Roll Santa Claus
Give empty cardboard toilet paper rolls a festive makeover by turning them into Santa Claus.
What you’ll need:
- Empty cardboard rolls
- Red, white, and peach-colored paper
- Cotton wool
- Glue
- Markers
- Child-safe scissors
How to make it:
Cover the cardboard roll with red paper. Add a peach-colored face, cotton wool for Santa’s beard, and a small red paper hat with a white trim.
Draw two eyes and a cheerful smile. You can also add a black paper belt around Santa’s waist.
Make several Santa figures and use them as decorations on a shelf or children’s craft table.
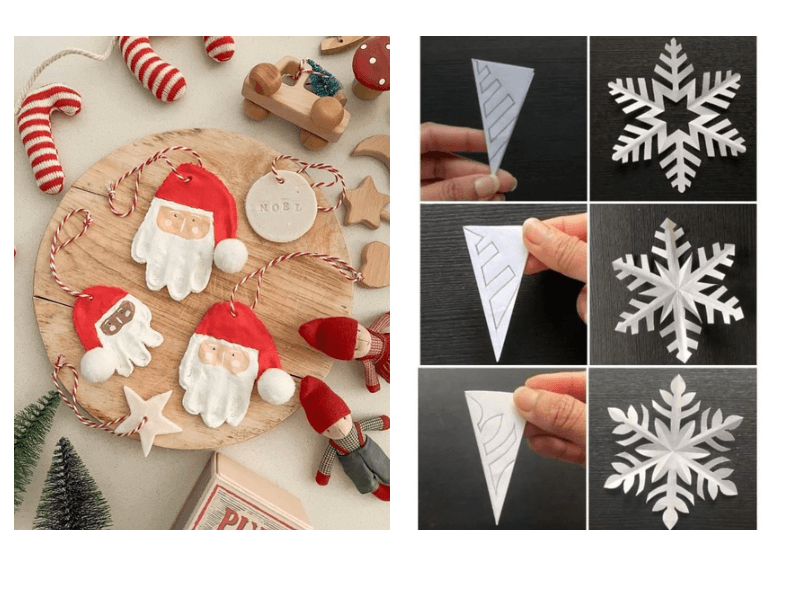
4. Salt Dough Christmas Ornaments
Salt dough ornaments are a lovely way to create personalized Christmas decorations that your family can bring out every year.
What you’ll need:
- 2 cups all-purpose flour
- 1 cup salt
- About ¾ cup water
- Cookie cutters
- A straw
- Paint and ribbon
How to make it:
Mix the flour and salt in a bowl, then gradually add water until a firm dough forms. Roll out the dough and cut shapes using Christmas cookie cutters.
Use a straw to make a small hole near the top of each ornament. Bake at a low temperature, around 200°F (95°C), for approximately 2–3 hours, or until thoroughly dry. Larger or thicker shapes may take longer.
Once completely cool, decorate with paint and thread ribbon through the holes.
Important: These ornaments are for decoration, not eating. Keep raw dough away from children who may put it in their mouths, and have an adult handle the oven.
5. Handprint Christmas Tree
This is a sweet Christmas keepsake for families with babies, toddlers, and preschoolers.
What you’ll need:
- Green washable, non-toxic paint
- White or colored cardstock
- Paintbrush
- Star stickers
- Markers
How to make it:
Help your child make several green handprints on a sheet of paper, arranging them in a triangle to resemble a Christmas tree.
Once the paint dries, decorate the tree with colorful stickers and add a star at the top.
Write your child’s name and the year at the bottom.
You can repeat this craft every Christmas and watch how those little hands grow over time.
6. Paper Snowflakes
Paper snowflakes are a classic Christmas craft that costs almost nothing to make.
What you’ll need:
- White paper
- Child-safe scissors
- Pencil
- Optional glitter-free decorations or stickers
How to make it:
Fold a square sheet of paper several times, then carefully cut small shapes along the folded edges. Unfold the paper to reveal your unique snowflake.
Hang the finished snowflakes in windows, on walls, or from the ceiling using string.
For a festive display, make snowflakes in different sizes and arrange them together.
This is a fun way to create a winter wonderland indoors, even if Christmas in your part of the world is warm and sunny!
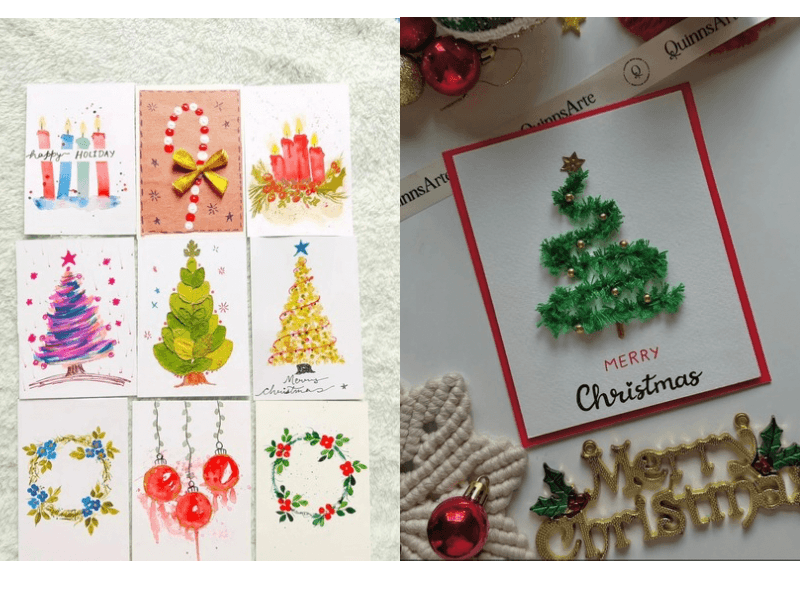
7. DIY Christmas Greeting Cards
Handmade Christmas cards are a thoughtful way to send holiday wishes to the people you love.
What you’ll need:
- Cardstock
- Crayons or markers
- Stickers
- Glue
- Ribbon or scraps of colored paper
How to make it:
Fold a piece of cardstock in half to make a card. Let the children draw Christmas trees, stars, bells, presents, or their favorite holiday characters.
You can also cut out simple shapes from colored paper and glue them onto the card.
Write a personal Christmas message inside and send the cards to family members, friends, neighbors, or teachers.
8. Pinecone Christmas Trees
If you can find clean, dry pinecones, they make lovely miniature Christmas trees.
What you’ll need:
- Pinecones
- Green paint
- Small pom-poms
- Glue
- Cardboard circles for bases
How to make it:
Paint the pinecones green and allow them to dry. Glue them onto cardboard bases so they can stand upright.
Decorate the tips with small pom-poms or colorful paper circles, then place a tiny star at the top.
Arrange your mini trees on a mantel, dining table, or shelf for a natural Christmas display.
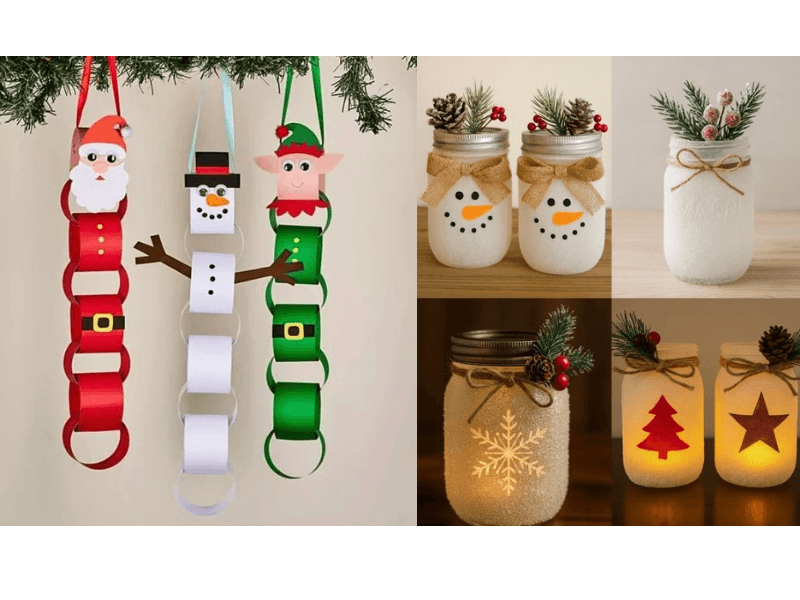
9. Christmas Paper Chain Garland
Paper chains are an easy and colorful way to decorate your home with handmade Christmas cheer.
What you’ll need:
- Red, green, white, or gold construction paper
- Glue or tape
- Scissors
How to make it:
Cut the paper into strips of equal size. Form the first strip into a loop and secure it with glue or tape.
Thread the next strip through the first loop and secure it to make another link. Continue until you have a long chain.
Drape your garland around the Christmas tree, across a doorway, or along a wall.
Budget-friendly idea: Use leftover wrapping paper or old colorful magazines to create a unique garland.
10. DIY Christmas Gift Tags
Make your presents extra special with handmade gift tags.
What you’ll need:
- Cardstock or recycled cardboard
- Markers
- Hole punch
- Ribbon or string
- Stickers
How to make it:
Cut the cardstock into small rectangles, circles, stars, or Christmas tree shapes.
Decorate each tag with drawings, stickers, or simple patterns. Punch a hole at the top and thread through a piece of ribbon or string.
Write the recipient’s name on each tag and attach it to your wrapped presents.
These tags are a lovely way to use up small scraps of paper left over from other crafts.
11. Reindeer Paper Bag Puppets
Create adorable reindeer puppets that children can use for pretend play and Christmas storytelling.
What you’ll need:
- Brown paper bags
- Brown construction paper
- Red pom-poms
- Googly eyes or paper eyes
- Glue
- Child-safe scissors
How to make it:
Use a brown paper bag as the reindeer’s body and face. Cut out two antlers from brown paper and glue them to the top.
Add eyes and a red nose, then draw a cheerful smile.
Once the glue dries, children can use their puppets to act out Christmas stories or put on a little family puppet show.
12. Mason Jar Christmas Lanterns
Mason jars can be transformed into beautiful Christmas decorations for your home.
What you’ll need:
- Clean glass jars
- Tissue paper
- White craft glue suitable for the project
- Ribbon
- Battery-operated LED tea lights
How to make it:
Tear the tissue paper into small pieces and attach them to the outside of the jar using a thin layer of glue. Choose festive colors such as red, green, white, or gold.
Allow the jar to dry completely. Tie a ribbon around the top and place a battery-operated LED tea light inside.
The soft glow makes these lanterns perfect for a Christmas table, windowsill, or cozy evening display.If you still want to know how to go about making one read DIY Mason Jar Decorations: Easy and Beautiful Ideas for Your Home; https://sallyohjay.com/diy-mason-jar-decorations/
Safety note: Use LED lights rather than real candles, especially in homes with young children.
13. Button Christmas Tree Art
If you have spare buttons in different colors and sizes, this is a lovely way to turn them into Christmas artwork.
What you’ll need:
- Cardstock or a small canvas
- Green, red, and gold buttons
- Glue suitable for the materials
- Pencil
- Optional frame
How to make it:
Draw a simple Christmas tree outline on the paper or canvas.
Arrange the buttons inside the outline, starting with larger buttons at the bottom and smaller ones near the top. Once you’re happy with the design, glue them into place.
Add a star at the top and a small brown trunk.
For families with toddlers, replace small buttons with larger paper circles or stickers to reduce choking risks.
14. Christmas Sock Snowman
Turn a clean white sock into a cute snowman decoration.
What you’ll need:
- A clean white sock
- Rice or stuffing
- Elastic bands or string
- Fabric scraps or ribbon
- Markers or felt pieces
How to make it:
An adult should fill the sock with rice or suitable stuffing and tie it securely to create a rounded body. Use another tie to form the head.
Fold the top of the sock into a hat, then add a ribbon scarf and a face made from felt.
Display your snowman on a shelf or beside your Christmas decorations.
Safety note: Rice, elastic bands, and small decorations can be choking hazards. Keep this project away from young children unless an adult handles the materials and ensures the finished decoration is inaccessible to them.
15. Felt Christmas Tree for Toddlers
Whats a Christmas craft without a felt Christmas tree it is a fun, reusable activity for little ones who love moving things around.
What you’ll need:
- Green felt
- Colored felt scraps
- Fabric-safe adhesive or sewing supplies
- A large piece of backing felt
How to make it:
Cut a large Christmas tree shape from green felt and attach it securely to a suitable backing.
Cut out large ornaments, stars, presents, and other festive shapes from different colors of felt.
Children can arrange the shapes on the tree, remove them, and decorate it again and again.
For toddlers, use oversized pieces without detachable small parts and supervise the activity closely.
16. Cardboard Christmas Village
Create a charming little Christmas village using cardboard boxes and recycled packaging.
What you’ll need:
- Small cardboard boxes
- White, brown, and colored paper
- Glue
- Markers
- Cotton wool for decorative snow
How to make it:
Cover small boxes with paper and turn them into houses, shops, or little cottages. Draw windows and doors, then add paper roofs and other decorations.
Arrange the houses together on a table or shelf to create a miniature Christmas village.
Older children can add paper trees, tiny roads, and cardboard people to make the scene more detailed.
This is a great project for families who enjoy creative recycling.
17. DIY Christmas Bookmarks
Encourage a love of reading with festive handmade bookmarks.
What you’ll need:
- Cardstock
- Colored paper
- Markers
- Stickers
- Ribbon
How to make it:
Cut cardstock into long rectangles and decorate them with Christmas trees, stars, candy canes, or holiday messages.
Punch a hole at the top and add a ribbon if desired.
Give the bookmarks to family members or tuck them into Christmas books as little handmade gifts.
You could also use them during your family’s December Bible-reading or Christmas story time.
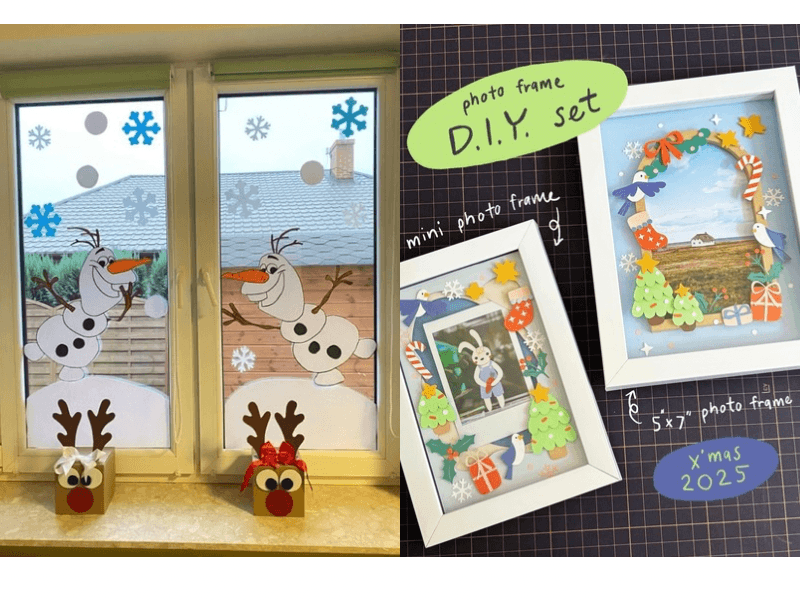
18. Christmas Window Decorations
A great Christmas craft is to decorate your windows with colorful Christmas shapes made from paper.
What you’ll need:
- Colored construction paper
- Scissors
- Pencil
- Removable tape
How to make it:
Draw and cut out Christmas trees, stars, bells, stockings, presents, and other festive shapes.
Arrange them on the window using removable tape.
For a coordinated look, choose two or three colors and repeat the shapes across the window.
This is a simple way to make your home feel festive without buying extra decorations.
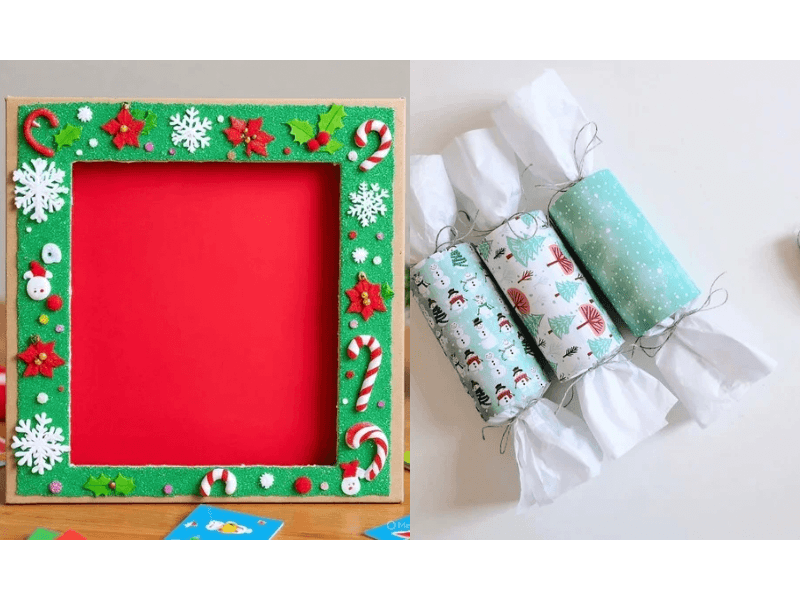
19. DIY Christmas Photo Frame
Create a festive frame for a favorite family Christmas picture.
What you’ll need:
- Cardboard
- Colored paper
- Glue
- Ribbon
- Stickers or paper decorations
How to make it:
Cut a rectangular frame from cardboard, leaving an opening in the middle for the photograph.
Cover it with colored paper and decorate it with Christmas trees, stars, bows, or paper presents.
Attach a ribbon or cardboard stand so you can display the frame.
Add a family photograph and write the year on the back to create a keepsake you can bring out every Christmas.
20. Toilet Paper Roll Christmas Crackers
Make colorful paper decorations inspired by traditional Christmas crackers.
What you’ll need:
- Empty cardboard rolls
- Wrapping paper
- Ribbon
- Paper decorations
- Small paper notes
How to make it:
Place a cardboard roll on a sheet of wrapping paper and roll it up, leaving extra paper at both ends.
Tie each end with ribbon to create the classic cracker shape. Decorate with stars, stickers, or handmade labels.
You can place a joke, Christmas greeting, or kind message inside before closing it.
Keep these as decorative favors or use them during family dinner. Avoid hard sweets or small trinkets if young children will be handling them.
21. Christmas Candy Cane Paper Craft
Create oversized candy cane decorations from simple materials.
What you’ll need:
- White cardstock
- Red paper or red markers
- Scissors
- Glue
- Ribbon
How to make it:
Draw a candy cane shape on white cardstock and cut it out.
Add red diagonal stripes using paper strips or markers. Attach a ribbon at the top if you want to hang it on the Christmas tree.
Make several candy canes in different sizes to decorate a wall, a child’s bedroom, or a festive craft display.
These are a fun alternative to real candy decorations, especially in homes with little children.
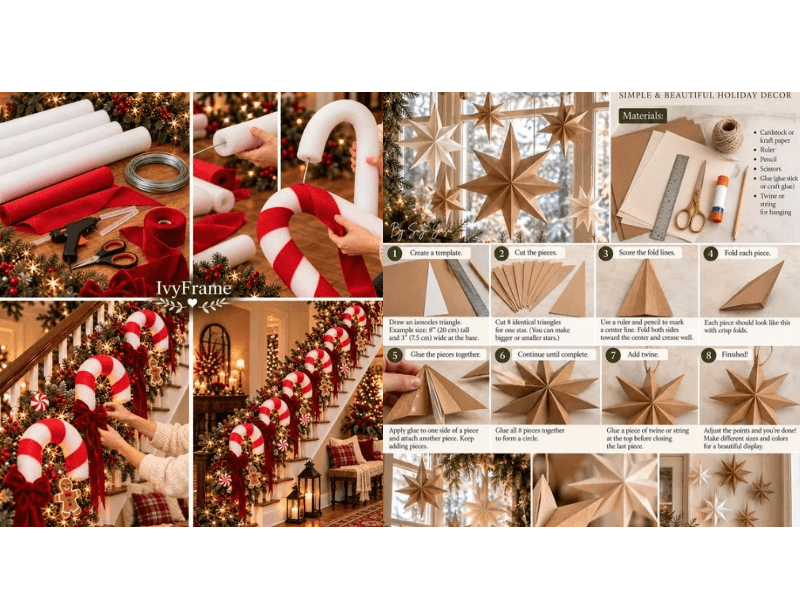
22. DIY Christmas Paper Stars
Paper stars are beautiful decorations that can be hung from ceilings, windows, or Christmas trees.
What you’ll need:
- Colored paper or cardstock
- Pencil
- Scissors
- Glue
- String
How to make it:
Cut out two matching star shapes from cardstock.
Decorate each star with markers, stickers, or simple patterns. Glue the two shapes together, leaving a small section to attach a loop of string if needed.
For a three-dimensional effect, older children can make folded paper stars with adult guidance.
Hang the finished stars together to create a festive display.
23. Mini Christmas Gift Boxes
Turn small cardboard boxes into beautiful handmade Christmas gift boxes.
What you’ll need:
- Small cardboard boxes
- Wrapping paper
- Glue or tape
- Ribbon
- Gift tags
How to make it:
Wrap the boxes in festive paper and secure the edges with tape or glue.
Tie ribbon around each box and attach a handmade gift tag. You can use the boxes to package small presents, gift cards, or handmade treats.
For an extra special touch, let the children decorate a box for each member of the family.Its the season of giving and this Christmas craft is one i personally love.
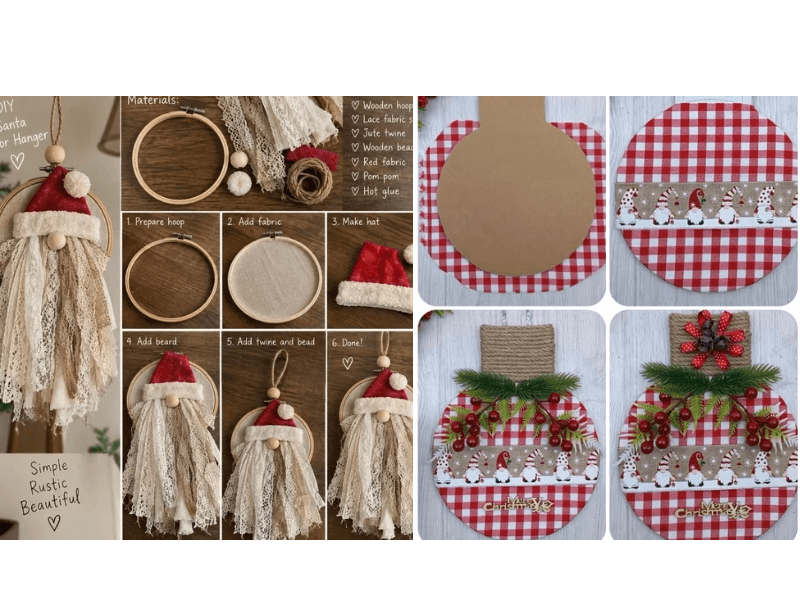
24. DIY Christmas Door Hanger
Another great Christmas craft is to welcome guests into your home with a handmade Christmas door hanger.
What you’ll need:
- Cardboard
- Colored paper or paint
- Ribbon
- Markers
- Decorative stickers
How to make it:
Cut a large circle, star, or Christmas tree shape from sturdy cardboard.
Decorate it with festive colors and add a message such as “Merry Christmas,” “Welcome,” or “Joy to the World.”
Attach a ribbon at the top and hang it on an interior door or another suitable spot.
This is an easy project that older children can personalize with their own messages and designs.
25. Christmas Memory Hand print Keepsake
End your Christmas craft with a project that captures a little piece of childhood.
What you’ll need:
- Washable, non-toxic paint
- Cardstock or a small canvas
- Paintbrush
- Markers
- Optional frame
How to make it:
Help each child make a handprint on the paper or canvas. Once the paint dries, turn the prints into Christmas trees, reindeer, wreaths, or festive characters.
Write each child’s name and the year beside their print.
For families with several children, place all the handprints together on one canvas to create a beautiful family keepsake.
Repeat the activity every Christmas and watch how much the children grow!
Tips for Making Christmas Craft Time Easier With Kids
Take advantage of simple, everyday interactions, by getting the whole family involved. Family meal time, watching a favorite television show, doing homework, or even doing the groceries can all be great opportunities to form a closer relationship with your child. Through these experiences, children will come to appreciate and understand the importance of family time as well.https://childventures.ca/blog/the-importance-of-family-time/
Crafting with children should be fun, not stressful. Here are a few simple ways to make your Christmas DIY sessions more enjoyable.
1. Prepare Your Materials Ahead of Time
Gather your paper, glue, paint, scissors, and decorations before inviting the children to the table.
Having everything ready means you can spend more time creating and less time searching for supplies.
2. Choose Crafts That Match Your Children’s Ages
Simple paper crafts, large stickers, and hand print art are great starting points for younger children.
Older kids may enjoy more detailed projects such as salt dough ornaments, cardboard villages, or handmade gift boxes.
3. Protect Your Workspace
Cover the table with old newspaper or a washable tablecloth. Keep wipes and a damp cloth nearby for quick cleanups.
A little preparation can make the whole experience much more relaxing.
4. Don’t Aim for Perfection
Your child’s Christmas tree may have too many decorations on one side. Their snowman may look a little unusual, and their greeting card may contain some very creative spelling.
That’s the beauty of handmade crafts!
Focus on enjoying the process rather than making everything look perfect.
5. Display Their Finished Creations
Give the children a place to show off their work.
You could create a Christmas craft wall, hang ornaments on the tree, arrange paper crafts on a shelf, or save special keepsakes in a memory box.
Children love knowing that their creations are valued.
6. Keep Safety in Mind
Supervise children throughout craft time. Adults should handle hot glue guns, ovens, sharp tools, and other potentially dangerous materials.
Keep small parts, buttons, beads, magnets, and similar items away from young children who may put them in their mouths. Choose non-toxic, age-appropriate materials and follow product instructions.
Go On And Make This Christmas Creative and Memorable
Christmas crafting is about so much more than making decorations. It’s about spending time together, letting children express their creativity, and creating little memories that become part of your family’s Christmas story.
You don’t need expensive supplies or an entire day to make something special. Even a simple paper wreath or handmade Christmas card can bring plenty of joy.
Choose a few ideas from this list, gather your family around the table, put on your favorite Christmas songs, and enjoy creating together.
And remember, mama: the finished craft doesn’t have to be perfect. Sometimes the glue-covered fingers, the colorful mess, and the laughter along the way are the best parts of all.
Which of these 25 easy Christmas craft ideas will you try with your family this year? Save this post for your holiday crafting sessions and share it with another mom looking for fun Christmas activities for her kids!
Happy crafting, and Merry Christmas!